Jun 23, 2011

Chocolate Orange Cupcakes

One last cupcake recipe before I leave them for the world of dieting (BOO! HISS!) - my chocolate orange cupcakes. I only have a bad, blurry iPhone photo of these bad boys as they were eaten very, very quickly. Even Kezz had a few and he's not a cake eater usually. Again, the icing can make more than you actually use depending on how thick you lay it on. I currently have a small half jar of it in the fridge that I'm trying not to eat with a spoon...

Makes: 36 mini cupcakes or 12-14 cupcakes (I made 24 minis and 6 normal - yes I know there's only 20 minis in the photo - the other 4 were eaten as they were iced. They're THAT BLOODY GOOD!)

Ingredients
For the cupcake mix
150g/5.5oz unsalted butter, softened
75g/2.75oz plain chocolate
250g/9oz caster sugar
5 large eggs
150g/5.5oz plain flour
2 tsp baking powder
Pinch of salt
Grated rind of 2 oranges

For the icing
550g/1lb icing sugar
160g/5.6oz unsalted butter, softened
50ml orange juice
50g/1.75oz cocoa powder
Grated rind of 1 orange

Method

  1. Preheat your oven to 180C/350F/Gas Mark 4. Line an appropiate sized tin with the paper cases of the size cupcakes you wish to make (i.e. muffin tin lined with muffin cases). Melt the chocolate in a heatproof dish set over a simmering pan of water (or in the microwave making sure you don't allow it to burn). Once melted set aside and allow to cool slightly (but not become solid).
  2. Beat the butter and sugar together in a bowl until light and fluffy. Gradually beat in the eggs. Sift in the flour, baking powder and salt into the mixture and fold together with a metal spoon.
  3. Fold the orange rind into the mixture. Check that your chocolate has cooled, then add it to your mixture and fold in again.
  4. Divide the batter between the cases, filling each one to about two-thirds full. Bake in the oven for 15-20 minutes (less if you're making the mini cupcakes) or until risen and springy to the touch (a skewer poked through the middle of one should come out clean). Leave to cool slightly in the tin before removing to a wire rack and allowing to cool fully (this is very important as otherwise the icing will melt and run off them).
  5. While the cakes are cooling you can make the icing. Whisk together the icing sugar, cocoa powder and butter in a clean bowl until the mixture resembles fine breadcrumbs. Add the orange juice and zest and whisk at a high speed for several minutes until light and fluffy (the longer you whisk the fluffier the icing you'll get).
  6. Divide the icing between the cold cupcakes. 

You could decorate the tops with little orange sweets, edible orange glitter, candied orange peel or pieces of Terry's Chocolate Orange if you're really feeling decadent! Mine sadly didn't last long enough to properly decorate and photograph nicely... I will be making them again (for a party or something, not for us to sit down and eat on our own in an evening!) and will decorate them properly then and update the photo!

Cupcakes and Diets


For the last while I have been baking up a storm, making cupcakes every other day; and eating them! Great for the taste buds, not so good for my poor waistline though... I knew I had to make a change when I bought a gorgeous pair of dark cream combat-style pants last week, a size up from my usual one, brought them home and THEY DIDN'T FIT! So I won't be making as many cupcakes as I was, until I've worked out some lower fat versions anyway!

This does give me the chance to explore new recipes though (every cloud has a silver lining) and I've been having fun with the low-fat challenge. Kezz has just started training too (more on that another time) so this couldn't be more timely. We're getting up early in the mornings, he goes running while I do some yoga and already there's a difference. The hardest part is my sweet tooth though, I didn't realise how much chocolate I'd been eating until now. I'm trying to switch over to other sweets for my evening consumption in front of the tv - currently chomping on Panda Natural Blueberry Liquorice - delicious!

The main cause of my weight gain are Earl Grey Tea Cupcakes (see pic at beginning of post). These are from The Hummingbird Bakery Cake Days, a fabulous book full of far too many scrumptious treats (you'll find a link to it at the end of this paragraph)! These are insanely good, everyone who has tried them goes nuts for them. It's the best of both worlds really, tea, and cake, in a bun! I will add that I usually have quite a bit of frosting left over from this recipe. I tend to pop the leftovers into the fridge and bake another half batch a day or two later to use it up. Or indeed, I have been known to sit down and eat the leftover frosting with a spoon...is it any wonder I've gained weight? I won't divulge their recipe here but I will recommend that you go out and buy this book immediately! Make these, and have a few for me :)

Jun 16, 2011

A New Start, and Some Delicious Seeded Bread

Well hello everyone! Apologies for the lack of activity the last 2 months or so, I've been busy!

So, what have I been up to? Well, I've been making, and eating, lots of cake and other yummy delights (my poor waistline!). I've also been making lots of jewellery and trying to sell it. It's going, eh, okay I guess. Definitely not as much fun as the cooking is though which is why I have decided to turn my energies back here. I'm even looking into going back to college to study culinary arts. Well, 30 is the new 20 after all... So this fresh start down in Co. Cork is going to turn into a fresh start career-wise as well. I have to admit, I'm very, very excited!

In honour of all this new-ness I thought I'd share a brand new recipe with you guys today. Fresh out of my head, not even finished baking it yet! It's a variation on the white bread that I've been making of late. I LOVE bread, I really do. There's so many things you can use it for. I like my breads simple and unfussy. Kezz likes this bread too but he adores seeded bread so I figured I'd go for the best of both worlds and make my favourite bread seeded this time and see how it went.

I don't know about any of you but I for one hate buying bread. I know how simple it is to make so it just seems wrong to purchase it. Standard sliced pans seem too fluffy and insubstantial since I started making my own and I balk at the prices for artisan breads - what I'd pay for a single loaf I could buy the ingredients and make 4 or 5 myself! Plus who can resist the smell of freshly baked bread, or the seemly magic process of watching the dough rise? That's the best part about making bread yourself, you're not just getting the end product but the whole experience. It brings back memories in such a rush too, sitting in either of my grandmother's kitchens, watching the bread some out of the oven, smothering the still-warm slices in butter and home-made jam and then running outside to eat it in the sunshine, shooing away curious bees attracted by the sweet, warm stickiness. Try putting that in a wrapper!

Nothing can evoke memories in quite the same way that scents can. The smell of coconuts will always remind me of holidays in the sun, and of sunburn! Orange blossom always brings me back to the time I spent in Toronto, though I have no idea where that connection was made. Fresh lemons remind me of my Mum making us pancakes for breakfast, tomatoes remind me of one of my aunts and the greenhouse she had in her former home in Dublin. Scent connects us to our past, to moments shared and experiences we'd almost forgotten.

A final word on this dough before I dive into the recipe; it can be used for almost any variation. The standard dough, sans wheat bran and seeds, makes a lovely white bread. Just leave them out and follow the rest of the recipe as it is. It also makes lovely pizza dough, simply roll it out and cover it in the toppings of your choice after the first proving, then pop it in the oven. It makes insanely good toast with a slightly sticky, chewy texture. Sliced and covered in peanut butter and chopped banana it is the super quick anytime of day snack (honestly, try it - peanut butter and jelly be-damned!). I've made it with beer today but you can use water too, I often do and it's just as good. It can also be used as the base for fougasse (basically a french style focaccia). Anyway, on with the recipe!


Makes: 1 large round loaf

Ingredients

500g/14oz strong white bread flour (plus extra for dusting)
300ml/ 1.25 cups hand-hot water/beer/milk
1 handful of wheat bran
1 generous handful mixed seeds of your choice (I've used sesame, sunflower, linseed and pumpkin)
7g sachet easy-blend yeast (available in most supermarkets) or 15g fresh yeast
2 tsp salt
1 tsp sugar (or honey)
2 tbsp olive oil

Method


  1. Tip the flour into a large mixing bowl, there's no need to sift it. For the dried yeast you can just pour it in too. The fresh yeast needs to be crumbled in and rubbed into the flour a little (like you would if making pastry or a crumble). Add the wheat bran, salt and sugar (or honey) now too.
  2. To get your hand-hot liquid I find that it's best to take about one-third of the overall liquid and boil it, then add the cold two-thirds. This ensures it's warm without being too hot (it needs to be warm enough the activate the yeast but not so hot that it actually kills it!). Add the oil to the liquid and give it a quick stir.
  3. Make a well in the centre of your dry ingredients and pour in all the liquid and oil mix in one go. Mix quickly using your hand (or a wooden fork) to make a soft, sticky dough. Make sure you wipe the dough around the bowl to pick up any loose flour.
  4. Sprinkle a clean work surface with flour and turn our the dough onto it. Knead the dough by stretching it away from you, and then folding it in half toward you before stretching it away again. Give it a quarter turn and repeat. You'll get into a rhythm after a minute and it's a great way for working out any stress or frustrations!
  5. After a few minutes make a little pocket in the dough and pour your choice of seeds in here. Continue kneading for a few more minutes until you have a nice scattering of seeds throughout and the dough is smooth.
  6. Put the dough back in the mixing bowl, cover with a clean tea towel and leave to rest for an hour. The dough has risen enough when it has doubled in size and springs back when you press it gently with your finger. This is the first proving.
  7. Tip the dough onto a floured surface once more and knead gently for a few seconds to remove air bubbles (knock it back as it's called). Shape into a round and place on a non-stick baking sheet. Make 3 or 4 slashes across the top with a sharp knife. Cover once more and rise for 30 minutes (this is the second proving). While it rises preheat your oven to 240C/475F/Gas Mark 9. Bake for 30-35 minutes until browned and crisp (you'll know it done if you tap the bottom of the loaf and it sounds hollow).
  8. Cool on a wire rack. This bread should keep for 2-3 days but honestly, it's normally all gone by the next morning in this house!
I know looking at this it can seem like a lot of work but honestly it's not. It can be made even easier for you too. Want fresh bread in the morning but don't have 2 hours to play with? No problem! Instead of leaving the bread to sit for one hour to rise at room temperature you can make it up to step 5 above the night before and then pop it in the fridge to rise slowly overnight. Get up the next morning, follow step 6, turn the oven on to heat and then go jump in the shower. By the time you're done the bread will be ready to pop in the oven and you're done! By the time everyone else is up you've fresh bread on the table and you can seem like a kitchen wizard - able to knock out yummy bread in no time!

Mar 5, 2011

Three Fruit Scones


I love fruit scones. I especially love ones that are bursting with fruit! It's such a shame that most scones these days are limited to a handful of raisins, there's so much more that could be added! I've used the dried fruits I happened to have in the kitchen for these, but try any combination you like, once you keep the quantities the same you'll be laughing!

Makes: 10 scones

Ingredients

120g dried fruits (I've used 45g sultanas, 45g chopped dried apricot, 30g chopped dried prunes)
450g self-raising flour, plus extra for dusting
2 teaspoons baking powder
120g butter
2 large eggs
5 tablespoons milk, plus extra for glazing
Pinch of salt
Orange juice for soaking

Method

  1. Preheat the oven to 200C/400F/Gas Mark 6.
  2. Put the fruit mixture in a bowl and pour in enough orange juice to cover. Stir, and leave aside.
  3. In a large bowl mix your flour, salt and baking powder. Rub in the butter until the mixture resembles fine breadcrumbs.
  4. In another bowl or a jug beat the eggs and milk together. Drain the fruit.
  5. Make a well in the centre of your dry ingredients and pour in your egg mix, followed by the mixed fruit. Stir well, until you have a soft, dry dough.
  6. Turn out the dough onto a floured surface and roll out to a thickness of 2cm. Using a 7cm cutter cut circles from the dough. You'll need to add the scraps together and re-roll it to get all 10, but try not to over-work the dough either.
  7. Place the scones on a baking sheet and glaze by dipping a pastry brush into some milk and brush over the scones.
  8. Pop in the oven and bake for 15-20 minutes, or until a lovely golden brown.
  9. Allow to cool slightly on a wire rack before serving. I'll have mine with real butter and a coffee thanks! :)

My Best White Bread


Nothing beats the smell of freshly baked bread coming out of the oven, or slicing it to the exact thickness you require, not what (insert big bread company name here) thinks you should have. Like everything else made at home there's no unpronounceable ingredients, no chemicals added to make it last for weeks on a shelf, no plastic bag. Just you, a warm kitchen, and a little bit of love.

Makes 1 large loaf.

Ingredients

450g strong white flour, plus extra for dusting
Good pinch of salt
7g sachet dried yeast
1tbsp vegetable oil, plus extra for greasing
300ml warm water

Method

  1. Mix the flour, salt and yeast together in a large bowl. Make a well in the centre and add the oil and water, stirring well together to make a soft dough.
  2. Now, you can either turn the dough out and knead it by hand on a floured surface for about 10 minutes, or use an electric mixer with dough hooks attached for about 5 minutes. I used to always do it by hand until I actually tried the dough hooks, now I'm converted!
  3. Return the dough to the bowl (or leave it there if you used the hooks!) and cover with clingfilm. Pop it somewhere nice and warm (like an airing cupboard) for an hour so the dough can rise. It should just about double in size.
  4. Turn the dough out onto a floured surface and gently knead for 30 seconds or so, this is called 'knocking back'. It should be lovely and smooth at this point.
  5. Shape the dough into a large rectangle, the length of the baking tin and three times the width. Grease the tin well and fold the dough over itself three times lengthways. Pop it into the baking tin with the join underneath (it gives it a better appearance once baked). Cover in clingfilm again and leave to rise for another 30 minutes in a warm place once more.
  6. Preheat the oven to 220C/425F/Gas Mark 7. Bake the loaf in the centre of the oven for 25 - 30 minutes, or until golden brown. Turn out the loaf and tap the bottom, if it sounds hollow then you'll know it's cooked. Cool on a wire rack for at least half an hour before slicing. As delicious as warm bread is, it's so much harder to slice properly, and I've butchered many loaves with my impatience to get eating!


*This loaf should keep for 3 or 4 days in an airtight container.

Feb 26, 2011

Crumbly Raspberry Oat Slices

Moments before I om, nom, nom...


Sort of a do-it-yourself cereal bar, without all the stabilisers and hydrogenated this and that. Any soft fruit can be used here, blackberries, blueberries, strawberries, whatever is your favourite. You could also add some chopped nuts if that's what takes your fancy. If you're using fresh fruits pop them into the freezer before you start, I like to break the frozen raspberries apart with my fingers so I have a fruit crumble, it gives me a much more even layer.

Makes: 16 slices

Ingredients

175g unsalted butter, diced and allowed to soften slightly
100g plain flour
75g extra coarse wholemeal flour
150g porridge oats
175g caster sugar
250g raspberries
zest of one lemon
icing sugar for dusting

Method

  1. Preheat your oven to 180C/350F/Gas Mark 4. Grease a 10 inch square shallow baking tin.
  2. In a large mixing bowl rub in your butter, flours and oats until they resemble a coarse crumble. Add your caster sugar and lemon zest and continue mixing until starting to come together slightly.
  3. Put half the crumble mix in the baking tray and pat down firmly. Cover with raspberries in an even layer.
  4. Add other half of crumble mix and pat down firmly again.
  5. Bake for 45 minutes - 1 hour or until golden brown in colour. Remove from oven, cut into slices and allow to cool in the tray before removing.
  6. Dust with a little icing sugar and serve. Delicious!

Feb 21, 2011

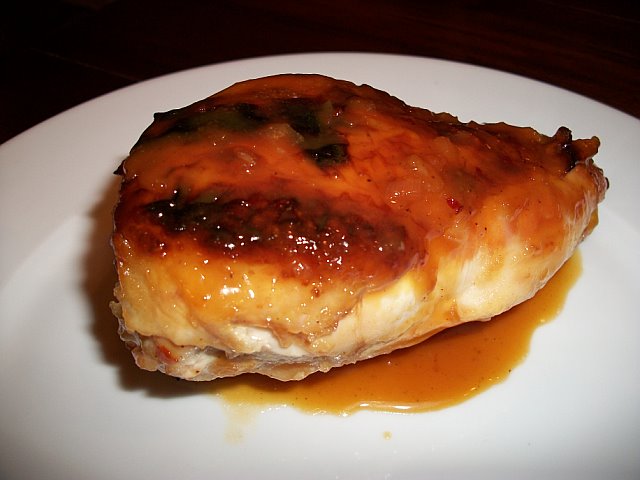
Honey Glazed Chicken


A simple idea for turning chickens breasts into something scrummy and delicious. Prepare to meet your new favourite dinner! Quantities are easily manipulated to serve a crowd.

Serves 2

Ingredients
2 chicken breasts, skin on, bone in
Half a lemon
1tbsp clear honey
1tbsp dark soy sauce

Method

  1. Preheat your oven to 190C/Gas Mark 5. Lay the chicken, skin side up, in a small baking or roasting dish. Season.
  2. Squeeze the juice from the lemon into a bowl and stir in the honey and soy sauce. Stir well to mix and spoon this mixture over the chicken breasts.
  3. Tuck the squeezed out lemon half between the two chicken breasts (to moisten and add flavour).
  4. Roast, uncovered, for 40-45 minutes until done and richly glazed, basting with the juices at least twice.
  5. Serve with green salad and garlic roasted potatoes

Feb 7, 2011

Cakes and bakes

Carrot-cake Cupcakes

I keep meaning to add some of the cakes I've done for birthdays etc. Have at least got the pictures on today, will add the recipes over the next few weeks (I promise, for reals!). A good few of these bad boys are gluten-free so ya'll can enjoy ;-)


Gluten-free Lemon Drizzle cake (made with...POTATO...oh yes!)

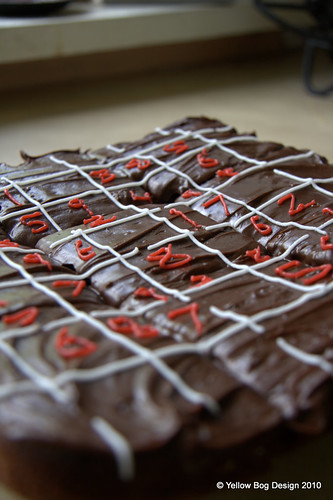
Chocolate-fudge Sudoku Cake!

Siobhan's birthday cake (not my most 100% prettiest one but dang it was good, especially for gluten-free!)

Feb 4, 2011

Work in progress...

Wasn't too impressed with yesterday's muffins...though that didn't stop me eating them...but am re-working the recipe this morning. Will arrange a taste testing and should that go well I'll share the new recipe with you all.

Also have to pick up the ingredients for the other breakfast muffin idea I had and work out how I'm going to make them. Am so super excited about this recipe...watch this space...

In other news in the kitchen...

Feb 3, 2011

Ginger Beef Stir-fry

Ingredients

400g lean beef sirloin
2 yellow onions
1 egg, beaten
1tbsp cornflour
Rapeseed oil
2tbsp soy sauce
2tsp sugar
half tsp sesame oil
half tsp rice wine vinegar
5cm piece fresh ginger, finely chopped

Method

  1. Thinly slice the beef against the grain.
  2. Stir together the beef and the egg in a bowl. Stir in the cornflour and 1 tsp of rapeseed oil. Leave to stand for about 30 minutes.
  3. Cut onions into quarters lengthways, then half the quarters across the middle and separate the pieces.
  4. In a small bowl mix together the soy sauce, sugar, sesame oil, vinegar, and 2 tablespoons of water. Set aside.
  5. Heat about half a cup of rapeseed oil in a wok over a medium-high heat until just smoking.
  6. Transfer the beef into the hot oil and cook until the colour has changed. Remove the beef using a slotted spoon and put aside on a platter.
  7. Add onions and ginger and stir-fry until onion is translucent, then transfer to the platter with the beef, again using the slotted spoon.
  8. Add the soy sauce mixture and simmer for 2-3 minutes to thicken. Stir in beef, onions and ginger and stir to coat.
  9. Serve with plain rice or noodles.

Maple Bacon Breakfast Muffins


For the last month or so I've been dying to make these muffins but every time I tried to I'd find I was out of maple syrup, or had no muffin cases, or something else would go awry. Finally today I made them, and they were so worth the wait. They've also given me an idea for another type of breakfast muffin...oh well, there goes the weekend!

Ingredients

220g plain flour
1tbsp baking powder
3tbsp golden caster sugar
1tsp salt
4 slices bacon, cooked crisp and crumbled (Marks & Spencer do Crispy Smoked Bacon Strips, 6 of them are perfect!)
225ml milk
2 eggs
125ml rapeseed oil
60ml maple syrup

Method

  1. Preheat oven to 200C/400F/Gas Mark 6. Line a muffin tin with 12 cases.
  2. Mix your dry ingredients, including the bacon, in a large bowl.
  3. Mix your wet ingredients in a large jug or another, smaller, bowl.
  4. Make a well in the centre of your dry ingredients and pour the wet mix in.
  5. Fold together with a metal spoon until well combined. There will still be a few lumps and bumps don't worry about them too much.
  6. Spoon your mix into your cases (about 3 tbsps a case should do it) and pop into the oven.
  7. Bake for 20 minutes, or until golden coloured and well risen.
  8. Cool on a wire rack. Seriously, they're much, much better cold. Plus you won't end up with a roof of mouth blister from the hot bacon like me...learn from my fail #LFMF

Feb 2, 2011

Green Duck Salad


I normally prefer meat well-done but having tried this cooked medium I have to say I really wouldn't cook it any other way now. Give it a try yourself, the meat is meltingly tender.

Serves: 2

Ingredients

1 duck breast fillet
half teaspoon ground coriander
1 shallot, very finely chopped
2tbsp balsamic vinegar
340g seedless green grapes, about a handful of which are halved
2 good big handfuls of mixed watercress, rocket, baby spinach leaves
2 green pears, cored and finely sliced

Method

  1. Remove skin and fat from duck by pulling fatty layer back and cutting it from the meat with a small, sharp knife.
  2. Mix 1 teaspoon salt, half teaspoon pepper and the coriander and use to season duck breast and set aside.
  3. Place fatty layer, skin side down, in a frying pan over a medium heat. Cook, turning occasionally, until you've cooked off as much liquid fat as you can. Keep 2 tablespoons of the fat in the pan and discard the rest (or keep for other uses). Discard the skin.
  4. Raise heat to high and place duck breast in pan to sear, about 3 minutes.
  5. Add shallots, turn duck breast and cook for another 3 minutes.
  6. Reduce heat to medium and continue to cook until duck is medium (rosy in centre). Transfer duck to small plate and cover with foil.
  7. Raise heat again to high, add 125ml water, balsamic vinegar and whole grapes to pan, and stir to scrape up any crispy, browned bits on bottom.
  8. Simmer until the liquid is reduced by about a third.
  9. Slice duck on bias into thin slices. Pour any resting juices into the pan.
  10. Arrange salad leaves in a bowl and top with alternating layers of pear and duck. Pour grape sauce over, scatter with grape halves, and stir through quickly.
  11. Serve. Eat. Enjoy!

Feb 1, 2011

Cream of Chicken Soup

One of the best uses for the left over bits of your chicken carcass. The uneaten meat goes into the soup, and the bones make the stock for next weeks soup, genius!

Serves 4-6

Ingredients

3tbsp butter
3 white onions, finely chopped
about 450g cooked chicken meat
600ml chicken stock
1tbsp chopped fresh parsely
1tbsp chopped fresh thyme
salt and pepper
175ml double cream

Method

  1. Melt the butter in a large saucepan over a medium-high heat. Add the onions and cook until slightly softened. 
  2. Add the chicken, stock, and herbs, and season with salt and pepper.
  3. Bring to the boil, then lower the heat and simmer for 25 minutes.
  4. Remove from the heat and allow to cool slightly before liquidising.
  5. Return soup to pan and warm over a medium heat. Stir in the cream and cook for a further 2 minutes, then remove from the heat and serve, delicious with crusty bread rolls.

Turkish Lamb Stew

It sounds a bit odd doesn't it? PRUNES and RAISINS in STEW?? With ALMONDS? It's amazing, I suggest you make it and try it today!

Ingredients

Olive oil
675g lean cubed lamb
1 white onion, finely chopped
3 cloves garlic, finely chopped
Half tsp ground cumin
1tsp chilli powder
1tbsp plain flour
2tbsp brandy
360ml chicken stock
3 mild chilli peppers, deseeded and finely sliced lengthways
30g almonds, coarsely chopped
12 prunes, stoned and coarsely chopped
45g raisins

Method
  1. Heat a little olive oil over a medium-high heat in a casserole dish. Working in batches add lamb and brown on all sides. Transfer each batch to a bowl.
  2. Add onion and garlic to the dish and return the lamb pieces too, along with any resting juices.
  3. Stir well, reduce heat to medium, and sprinkle with cumin, chilli powder, flour, half teaspoon each of salt and pepper. Stir until lamb is well coated.
  4. Add brandy and stir to scrape up any browned bits.
  5. Stir in the stock and about 60ml water. Bring to the boil.
  6. Once boiling reduce the heat to low, cover, and leave to simmer for 35-40 minutes to allow all the flavours to mingle.
  7. Add the chilli peppers and continue to simmer for another 20 minutes or so.
  8. Meanwhile, preheat the oven to 180C/350F/Gas Mark 4. Spread almonds on a baking sheet and toast until fragrant (about 10 minutes).
  9. Stir half the prunes and raisins into the stew and raise the heat to high. Stir until liquid has thickened.
  10. Remove from heat and stir in remaining raisins and prunes.
  11. Serve with plain boiled rice, and garnish with the toasted almonds.

Pineapple upside-down cake

I had never had pineapple upside-down cake until I made this one. You need to be fairly sure that you'll eat something when you're making about 2kgs of it but I figured it had sugar, butter, booze...what's not to like! As it turns out it is delicious, and one I'll certainly be making again. I had no rum when making this so I used whiskey and it was still yum. Kezz describes it as being "like an Irishman having a Caribbean orgy in my mouth". It really is that good!

Serves 6-8

Ingredients
(for the topping)
100g butter
100g light muscovado sugar
2tbsp Irish whiskey (or dark rum if you want to be traditional)
432g can pineapple rings, drained
(for the cake)
50g unsweetened desiccated coconut
100g butter, room temperature
200g golden caster sugar
3 eggs
175g plain flour
1tsp baking powder
2tsp vanilla extract
125ml milk

Method
  1. Heat oven to 180C/Gas Mark 4 and butter your baking dish (I used a 9" square tin). 
  2. Melt the butter, sugar and whiskey in a small saucepan until all the sugar has dissolved. 
  3. Place the pineapple in the baking dish and then pour over the syrup to form an even layer and leave aside.
  4. Cook the desiccated coconut in a dry frying pan over a gentle heat until it starts to turn golden. Remove from the heat and combine all the remaining ingredients.
  5. Pour into the cake tin and pop into the oven.
  6. Bake for 25-30 minutes or until golden and well-risen.
  7. Turn out onto a large plate and allow to cool slightly before serving.

Jan 28, 2011

Orange Milk Chocolate Truffles

Oh my goodness these are so insanely good. Prepare yourself and make double quantities, you'll probably eat half of them as you make them!

Makes 25-30 depending on how big you make them

Ingredients


100ml double cream
200g milk chocolate, broken into small pieces (get as high a cocoa content as you can: 34-38%)
1tsp orange essence
icing sugar, for rolling

Method
  1. Bring the cream just to the boil in a saucepan. Remove from the heat and stir in the chocolate until it's fully melted, then add the orange essence.
  2. Cool, then chill in the fridge for at least 2-3 hours.
  3. Scoop out small teaspoons of the mixture and roll into small walnut-sized balls with your hands, then roll in the icing sugar.
  4. Keep chilled until serving (or you can freeze them at this point, they will keep this way for 2-3 weeks, if you can stop yourself from eating them!)

    Jan 11, 2011

    La Bigoudenne Restaurant, Fermoy, Co. Cork, Ireland

    We went out to this restaurant to celebrate my Mother's birthday whilst she was visiting from Spain. The starters we had were a dish of crab, smoked chicken and ham (amazing!) and an apple and parsnip tartin which was magnificent. Our main courses were a striploin steak, duck breast and pheasant. The pheasant and duck were superb but the steak was overcooked and very fatty and full of gristle.

    When the waitress approached the table and asked how our food was she was informed by the person eating the steak that it wasn't up to the expected standard but that he would eat it nevertheless. About 5 to 6 minutes later the chef burst out of the kitchen carrying a vacuum-packed tray of meat which he slammed down on our table and started to shout at the gentleman having the steak that this was the piece that his steak had come from and that he knew 'nothing' about his food. He then stormed back into the kitchen without allowing anyone to argue their point with him at all. At this stage everyone in the (very small) restaurant was staring at our table. Might I add that the gentleman who was eating the steak had trained and worked in a butchers for 7 years so would be quite knowledgeable when it comes to his steaks!

    Needless to say we ate the rest of our meals in shock, changed our dessert order to something that could be consumed faster and left as soon as we could (being charged full price in spite of everything might I add!). My Mother's birthday was pretty much ruined at this stage.

    The food in La Bigoudenne is top-notch for the most part, we obviously just got a dodgy steak but it would have taken nothing for the chef to either A: stay in his kitchen and say nothing or B: come out and apologise but his temper tantrum left an awful lot to be desired. We will be telling everyone we know about this experience...

    Jan 4, 2011

    Roast bread

    Now, this is something that is a Krismas morning tradition in my family (and my other half thinks is the most disgusting thing he's ever heard) but I learned the other day that it's possible to do with any roast meat. I will be much fatter by the end of this year so...

    Ingredients


    Brown soda bread
    Leftover meat jelly

    Method

    1. Have a lovely roast dinner.
    2. Having collected the leftover roasting juices of your dinner leave them in a bowl in the fridge overnight.
    3. Next morning you will see that they have separated into a fatty top layer and jelly bottom layer. Scrape off the fat layer and bin it (or keep it for making roast potatoes!).
    4. Slice up your soda bread, not too thick, not too thin.
    5. Put a frying pan over a med-high heat.
    6. Put a large tbsp (or 2!) of your meat jelly onto a slice of soda bread and place in the frying pan. Rub the bread around in the liquid the jelly turns into, flip it over a few times, and generally allow it to soak up all those yummy meat juices and get crispy on the outside.
    7. Eat. You will be astonished at how good it is. No, it's not healthy but hey, we all need treats and pick-me-up's sometimes! :-)

    Butter-roasted saffron chicken

    This is from Annie Bell's 'The Country Cook' which has loads more delicious recipes in it. You can find it by clicking the link on the left - it's definitely worth investing in!

    I doubled the quantities as I needed to feed 5 hungry adults and the supermarket had no big chickens, but I'm giving you Ms. Bell's original recipe. Gorgeous moist chicken meat, just lovely!

    Serves 6 (according to the book, 4 according to me!)


    Ingredients

    A good pinch of ground saffron
    1 tbsp thyme leaves
    Sea salt
    75g unsalted butter, softened
    1x2kg chicken
    Juice of 1 lemon
    Cayenne pepper

    Method

    1. Preheat your oven to 220C/420F/Gas Mark 7.
    2. Blend the ground saffron, thyme and a little salt with 50g of the butter. Starting at the neck end of the chicken, slip your fingers beneath the skin to loosen it either side of the breastbone. Spread the butter mix over the breast meat and pat the skin back into place.
    3. Place the chicken in a roasting dish and spread with the remaining butter, pour over the lemon juice, season with salt and dust with the cayenne pepper.
    4. Roast for about an hour, without basting, then transfer it to a plate, tipping any juices inside the chicken back into the roasting tray.
    5. Pour the roasting juices into a bowl or jug and leave the chicken rest for 20 minutes.
    6. Serve hot or cold, with the buttery juices spooned over for those who like them (I didn't do this, go here to see why!)

    Boozy Leeks

    Great vegetable accompaniment to most dinners, my first time making leeks as a side dish in their own right and they went down a storm with everyone!

    Serves: 4-6 as a side dish

    Ingredients


    2 leeks, washed and trimmed
    Sprig of thyme
    Sherry
    Half pint of chicken or vegetable stock
    Knob of butter

    Method

    1. Chop leeks into half inch pieces through the white and light green sections, chop finely in the dark green part of the leaves.
    2. Put chopped leeks, stock, dash of sherry and thyme into saucepan and bring to the boil.
    3. Boil until leeks are tender.
    4. Drain, then stir through knob of butter until melted.
    5. Serve! Simples!

    Jan 1, 2011

    Quick-roast chicken for two

    So I was flicking through a food magazine today and I saw a recipe that sounded lovely for dinner tonight, but then I read the ingredients and the list became "he doesn't eat that, he doesn't eat that, or that. Hmm, it's not really very winter seasony either. Hmm."
    So I popped to the supermarket for the chicken breasts (though mine are part-boned, skin on thankyouverymuch!) and mooched around the kitchen until I'd thrown this together. I've called it a quick-roast as it's done in about an hour (less if you use skinless, boneless chicken breasts) compared to an entire roast chicken! The quantities are so easily bumped up to feed more than two, having made this once I'll now be making it again, and again, and it'll be on some of our dinner party menus for sure!
    On a side note, I've used marjoram as it's a lovely light herb that goes delightfully well with chicken. I know it's not a common herb these days (not trendy enough I guess) but it's so suitable here, and sets off the vegetables perfectly too. As a member of the mint family it has a lovely sweet, delicate flavour, and works so well with roasts. If you can't find it feel free to use sage or rosemary, though they'll be much more robust so go easy with them.


    Serves 2 but easily changed to feed more


    Ingredients


    2 carrots, quartered lengthways and cut into large chunks
    2 parsnips, quartered lengthways and cut into large chunks
    1 white onion, roughly chopped
    4 large potatoes, peeled and chopped into large chunks
    Large pinch of thyme
    Large pinch of marjoram
    Rapeseed oil
    2 chicken breasts, part-boned, skin on
    About half a cup of chicken stock and a dash of white wine or sherry


    Method


    1. Preheat your oven to 200C/400F/Gas Mark 6
    2. Peel and chop your potatoes, carrots, parsnips and onion.
    3. Oil a suitably sized roasting dish and add your vegetables. Give them a good roll around in the oil and then sprinkle over your chosen herbs.
    4. Pop the vegetables in the middle of your oven for 30-35 minutes.
    5. When your veggies are about 20 mins in put a frying pan over a high heat and add a little oil. Fry your chicken breasts until golden brown and starting to crisp on the outside.
    6. Add the seared chicken breasts to the vegetables in the roasting dish (skin side up so it stays crispy) and place back in the oven.
    7. Again, after about 20 minutes take the roasting dish out of the oven and drizzle the half cup of stock and sherry over everything. Return to the oven for another 10-15 minutes.
    8. Remove from the oven and dish up!
    Now, you'll have to excuse the quality of the photo, I was dying to get eating so just grabbed a quick shot on my iPhone, but you get the idea!